Creating a Workout Routine During Rehabilitation
A workout routine during rehabilitation should rebuild strength safely. Here's how to plan exercises, track progress, and avoid setbacks while healing.
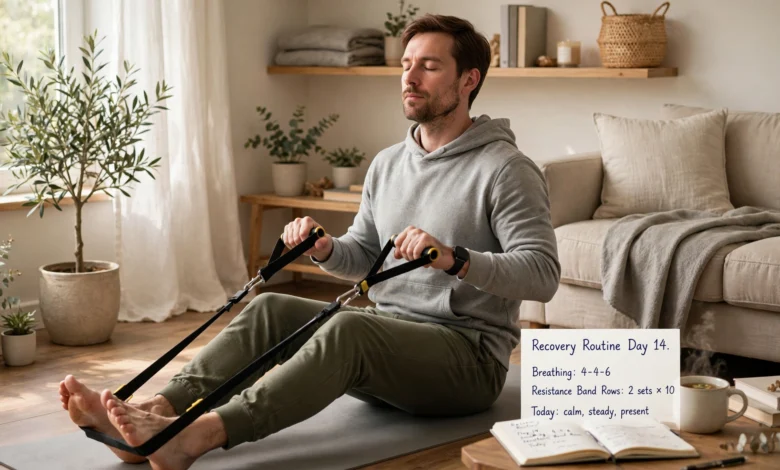
A workout routine during rehabilitation looks very different from your usual training plan, and that’s the point. Whether you’re coming back from knee surgery, a torn rotator cuff, a back injury, or a long illness, your body is in a rebuilding phase. The goal isn’t to set personal records. The goal is to restore movement, rebuild strength, and get back to the things you care about without getting hurt again.
The tricky part is that recovery rarely follows a straight line. Some weeks you feel stronger than you expected. Other weeks a simple exercise leaves you sore for days. Without a clear plan, it’s easy to swing between doing too much and doing nothing at all, and both can slow your progress.
This guide walks you through how to build a safe rehab exercise plan from the ground up. You’ll see how the phases of injury recovery work, which types of rehabilitation exercises belong in your week, how to tell good soreness from warning pain, and how to progress without guessing. There’s also a sample weekly schedule you can adapt with your physical therapist.
One quick note before we start: everything here is general guidance. Your surgeon, doctor, or physical therapist knows your specific injury, and their instructions always come first. Use this article to understand the process, ask better questions, and stay consistent between appointments. Consistency, more than intensity, is what drives a successful recovery.
Why a Workout Routine During Rehabilitation Matters
After an injury or surgery, the body starts healing on its own, but healing and recovering aren’t the same thing. Tissue can repair while muscles around it weaken, joints stiffen, and your movement patterns quietly change to protect the sore area. A structured workout routine during rehabilitation addresses all of that.
Here’s what a well-planned routine does for you:
- Prevents muscle loss. Muscles can shrink noticeably within a couple of weeks of reduced use. Gentle, targeted work slows that decline.
- Restores range of motion. Scar tissue and stiffness set in fast. Regular movement keeps joints mobile.
- Retrains movement patterns. Limping or favoring one side becomes a habit if you don’t correct it.
- Reduces re-injury risk. A weak or unstable area is more likely to get hurt again once you return to normal activity.
- Supports mental health. Having a plan gives you a sense of control during a frustrating time.
Random exercise doesn’t deliver these benefits reliably. A routine does, because it applies the right amount of stress at the right time and builds on itself week after week.


Talk to Your Care Team Before You Start
Before you design any post-injury workout, get clear answers from your care team. This step sounds obvious, but many people skip it and end up guessing.
Questions to Ask Your Physical Therapist or Doctor
Bring these to your next appointment:
- What movements or positions should I avoid completely right now?
- How much weight can I put on the injured area?
- Is some pain during exercise acceptable, and how much?
- How often should I do my home exercises?
- What signs mean I should stop and call you?
- When do you expect me to move to the next phase?
Write the answers down. They become the boundaries of your workout routine during rehabilitation, and they’ll save you from second-guessing every session.
Why Professional Guidance Is Worth It
A licensed physical therapist can assess strength differences between sides, check joint mobility, and spot compensations you can’t see yourself. If you want to understand what a PT actually does and how to find one, the American Physical Therapy Association’s ChoosePT guide to physical therapy is a reliable place to start. For broader background on rehabilitation care, the MedlinePlus rehabilitation overview from the U.S. National Library of Medicine is also useful.
Understanding the Phases of Injury Recovery
Most injury recovery follows a similar sequence, even though the timeline varies a lot from person to person. Knowing which phase you’re in helps you choose the right exercises.
Phase 1: Protection and Early Healing
This is the first few days to weeks after injury or surgery. Tissue is fragile and inflammation is doing its job. Exercise here is minimal and very controlled.
Typical focus:
- Gentle movement of nearby joints to limit stiffness
- Breathing exercises and circulation work, like ankle pumps
- Isometric contractions (tightening a muscle without moving the joint), if cleared
Phase 2: Restoring Mobility
Once the initial healing settles, the priority shifts to getting movement back. You’ll work on range of motion exercises and light activation of weakened muscles.
Typical focus:
- Active and assisted stretching within a comfortable range
- Light muscle activation
- Normalizing walking or daily movement patterns
Phase 3: Building Strength
This is where most of the visible progress happens. You’ll add resistance gradually and start rebuilding the muscles that support the injured area.
Typical focus:
- Resistance band exercises and light weights
- Balance and stability work
- Controlled, slow repetitions with good form
Phase 4: Return to Function
The final phase prepares you for real life, whether that means returning to work, sport, or simply carrying groceries up the stairs without thinking about it.
Typical focus:
- Sport-specific or task-specific drills
- Higher-intensity strength work
- Power, agility, and endurance
You might move through these phases in six weeks or six months. What matters is meeting the criteria for each phase, not hitting a calendar date.
7 Steps to Build a Workout Routine During Rehabilitation
Here’s a practical process for putting your plan together. Think of it as a framework you fill in with your care team’s guidance.
Step 1: Set Clear, Specific Goals
“Get better” isn’t a goal you can plan around. Try something like “walk 20 minutes without a limp” or “lift my arm overhead to reach the top shelf.” Specific goals tell you which exercises matter most and give you a way to measure progress.
Break big goals into smaller ones:
- Short-term (1 to 2 weeks): Bend my knee to 90 degrees.
- Medium-term (4 to 6 weeks): Climb stairs normally.
- Long-term (3+ months): Return to jogging.
Step 2: Establish Your Starting Point
Before adding anything, note where you are today. Record simple markers:
- How far you can move the joint comfortably
- How long you can stand, walk, or hold a position
- Your pain level at rest and during activity (on a 0 to 10 scale)
- Any movements that feel unstable
This baseline makes it obvious later whether your rehab exercise plan is working.
Step 3: Choose Exercises for Your Current Phase
Pick a small number of exercises, usually four to eight, that match your phase and goals. More isn’t better here. A short list done well beats a long list done carelessly. We’ll cover the main exercise categories in the next section.
Step 4: Start With Low Volume and Low Intensity
Begin lighter than you think you need to. A common starting point for many rehab exercises is 1 to 2 sets of 8 to 12 repetitions, but your therapist may prescribe something different. The first week is about seeing how your body responds, not proving anything.
Step 5: Schedule Sessions and Recovery Days
Consistency is the backbone of any workout routine during rehabilitation. Some mobility exercises can be done daily. Strength work usually needs a rest day between sessions for the same muscle group. Put your sessions on the calendar like appointments so they actually happen.
Step 6: Track Your Response
After each session, jot down:
- What you did (exercises, sets, reps, resistance)
- Pain during and after
- How you feel the next morning
That next-morning check is one of the most useful signals you have. If symptoms are back to baseline within about 24 hours, the load was probably reasonable. If they’re worse and staying worse, you likely did too much.
Step 7: Progress Gradually
When an exercise feels easy and pain stays controlled, increase one thing at a time:
- Add a few reps
- Add a set
- Increase resistance slightly
- Make the movement more challenging (for example, moving from two legs to one)
Changing only one variable at a time means that if something flares up, you know exactly what caused it. This idea of progressive loading is how tissue adapts and gets stronger without being overwhelmed.
Types of Rehabilitation Exercises to Include
A balanced workout routine during rehabilitation usually pulls from several categories. Your mix depends on your injury and phase.
Range of Motion Exercises
These restore joint movement. Examples include heel slides for the knee, pendulum swings for the shoulder, and gentle neck rotations. Move slowly, stay in a range that feels tolerable, and avoid bouncing into stretches.
Isometric Exercises
Isometrics involve contracting a muscle without moving the joint, like pressing your knee down into a rolled towel. They’re often one of the first strength exercises allowed after surgery because they build activation with minimal joint stress. Some research also suggests they can temporarily reduce pain in certain tendon problems.
Resistance Band Exercises
Resistance band exercises are a staple of physical therapy exercises for good reason. Bands are cheap, portable, and let you adjust tension in small steps. Common examples:
- Band rows for upper back and shoulder
- Lateral band walks for hip stability
- External rotations for the rotator cuff
- Ankle inversions and eversions after a sprain
Balance and Proprioception Training
Injury often disrupts the body’s sense of joint position, called proprioception. That’s a big reason people re-sprain ankles or feel “wobbly” after knee surgery. Simple balance work helps:
- Standing on one leg near a counter for support
- Heel-to-toe walking
- Progressing to standing on a cushion or folded towel
Low-Impact Cardio
Keeping your heart and lungs in shape matters even when one part of your body is injured. Good options include stationary cycling, swimming or water walking, upper-body ergometers, and walking on flat ground. Choose whatever doesn’t load the injured area in a way your care team has restricted.
Core Stability Work
A stable trunk supports almost every movement. Exercises like dead bugs, bird dogs, and glute bridges help, especially after back, hip, or lower-limb injuries. Keep them controlled and focus on steady breathing.
Sample Weekly Workout Routine During Rehabilitation
Here’s an example of how a week might look during the strengthening phase for a lower-body injury, like recovery from a knee sprain. Treat it as a template to discuss with your therapist, not a prescription.
| Day | Focus | Example Activities |
|---|---|---|
| Monday | Strength + mobility | Heel slides, quad sets, band leg press, glute bridges, 10 min bike |
| Tuesday | Mobility + light cardio | Gentle stretching, 15 to 20 min walk on flat ground |
| Wednesday | Strength + balance | Mini squats to a chair, lateral band walks, single-leg balance, core work |
| Thursday | Active recovery | Easy mobility, short walk, rest if sore |
| Friday | Strength + mobility | Repeat Monday with a small progression |
| Saturday | Low-impact cardio | 20 to 25 min stationary bike or pool session |
| Sunday | Rest | Full rest or very light stretching |
A few notes on this plan:
- Mobility work can often be done daily in small doses.
- Strength days are spaced out to allow recovery.
- Each strength session should take about 30 to 45 minutes, including a warm-up.
Once you’re further along, the CDC physical activity guidelines for adults give a useful long-term target: at least 150 minutes of moderate activity per week plus muscle-strengthening work on two or more days. Rehab is how you build back toward that baseline.
How to Tell Normal Soreness From Warning Pain
This is one of the biggest sources of anxiety during injury recovery. Some discomfort is expected. Some pain means stop.
Pain That’s Usually Acceptable
- Mild muscle soreness 24 to 48 hours after a session
- Discomfort during exercise that stays low (many therapists use around 3 out of 10 as a rough ceiling) and settles within a day
- A feeling of effort or fatigue in the working muscles
Pain That Means Stop and Check In
- Sharp, stabbing, or sudden pain
- Pain that keeps rising during the session
- New swelling, warmth, or redness
- Symptoms that are worse the next day and not improving
- Numbness, tingling, or weakness that wasn’t there before
- Any sense that the joint is giving way
If you notice warning signs, stop that exercise and contact your therapist or doctor. It’s much easier to adjust early than to recover from a setback.
Common Mistakes That Slow Down Recovery
Even motivated people fall into these traps. Knowing them in advance helps you steer clear.
Doing Too Much, Too Soon
Feeling good on a Tuesday doesn’t mean your tissue is ready for a big jump in load. Healing tissue often feels stronger than it really is. Stick to gradual progression even when you’re tempted to push.
Skipping the Boring Exercises
Balance drills and small activation exercises can feel pointless. They’re often the ones that prevent re-injury. Don’t drop them because they aren’t exciting.
Ignoring the Uninjured Side
Keep training the rest of your body where it’s safe to do so. Staying active overall helps circulation, mood, and fitness. Training the healthy limb may even help limit strength loss on the injured side, a phenomenon called cross-education.
Relying Only on Therapy Appointments
One or two sessions a week with a therapist isn’t enough on its own. The real progress happens in your home exercise program between visits.
Stopping Once the Pain Is Gone
Pain often fades before strength and control fully return. Stopping too early is one of the most common reasons people get hurt again. Finish the program.
Tips to Stay Consistent and Motivated
A workout routine during rehabilitation only works if you actually do it. Here’s what helps:
- Keep sessions short. Twenty focused minutes beats an hour you keep putting off.
- Attach exercises to existing habits. Do your ankle mobility while the coffee brews.
- Track progress visibly. A simple notebook or phone note showing how far you’ve come is surprisingly motivating.
- Celebrate small wins. Walking to the mailbox without a brace counts.
- Prioritize sleep and nutrition. Your body repairs tissue while you rest, and it needs enough protein and overall energy to do it.
- Be patient with yourself. Bad days happen. One rough session doesn’t erase weeks of progress.
It also helps to remember why you’re doing this. Keep your long-term goal somewhere you’ll see it, whether that’s playing with your kids, returning to a sport, or simply moving without thinking about it.
When to Transition Back to Your Regular Training
Moving from rehab to normal training is a gradual handoff, not a switch you flip. Signs you may be ready include:
- Full or near-full range of motion compared to the uninjured side
- Strength close to the other side (therapists often test this directly)
- No pain or swelling after challenging sessions
- Confidence performing the movements your activity requires
- Clearance from your therapist or doctor
Even after you return, keep a few of your rehab exercises in your warm-up or as accessory work. They’re cheap insurance against the same problem coming back.
Conclusion
Building a workout routine during rehabilitation comes down to a few steady principles: get clear guidance from your care team, understand which phase of recovery you’re in, choose a small set of the right rehabilitation exercises, start light, track how your body responds, and progress one step at a time. A good plan balances mobility, strength, balance, and low-impact cardio, respects the difference between normal soreness and warning pain, and avoids the classic mistakes of rushing or quitting too early.
Recovery takes patience, but with a structured, consistent approach you give your body the best possible chance to heal fully and return to the life you want, often stronger and more aware of your body than before the injury.