Yoga for Recovery: 10 Poses That Help Heal
Yoga for recovery eases sore muscles, calms stress, and supports healing. These 10 gentle poses help your body rest and rebuild after hard days.
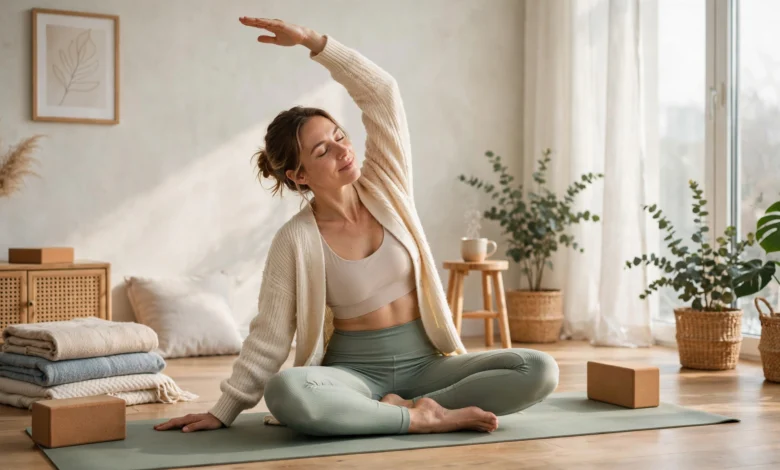
Yoga for recovery is one of the simplest things you can do for a body that feels worn out. Maybe you pushed hard at the gym, ran farther than planned, sat at a desk for ten hours, or you’re coming back after an illness or a rough stretch of life. Whatever the reason, your body is asking for a break, and a real break isn’t always the same as lying on the couch.
Recovery is where progress actually happens. Muscles repair, inflammation settles, and your nervous system shifts out of “go mode” and into rest. The problem is that many of us skip this part or treat it as optional. We stretch for thirty seconds, call it a day, and wonder why we feel stiff for the rest of the week.
That’s where restorative yoga and gentle movement come in. The right poses improve blood flow to tired muscles, loosen tight spots, and help your breathing slow down enough for your body to repair itself. You don’t need to be flexible, and you don’t need an hour. Even fifteen minutes can make a noticeable difference in how you feel the next day.
In this guide, you’ll find 10 recovery yoga poses that are easy to learn and kind to your joints. Each one comes with clear steps, what it helps with, and tips to make it more comfortable. You’ll also get a simple routine you can follow, plus safety advice so you can practice with confidence.
What Is Yoga for Recovery?
Yoga for recovery is a slower, gentler style of practice focused on helping your body rest and repair instead of challenging it. Where a power yoga class builds heat and strength, recovery-focused yoga uses long holds, supported positions, and relaxed breathing.
It borrows heavily from restorative yoga and yin yoga. Restorative yoga uses props like blankets, bolsters, and blocks so your body can fully relax in each pose. Yin yoga holds poses for several minutes to gently work on connective tissue. A recovery practice often blends the two with light movement, like cat-cow, to get blood moving without adding strain.
Think of it as a form of active recovery. Instead of complete rest, you’re doing low-intensity movement that supports circulation and flexibility. Many athletes use it on rest days, but it works just as well for anyone dealing with stress, stiffness, or fatigue.
Key Benefits of Yoga for Recovery
The benefits go beyond feeling a little looser. Here’s what a regular practice can do for you.
Eases Muscle Soreness and Stiffness
Gentle stretching increases blood flow to tired areas, which helps deliver oxygen and nutrients to muscles that need repair. That’s why yoga for muscle recovery is so popular with runners, lifters, and cyclists. It won’t erase soreness overnight, but it can make the next few days much more comfortable.
Calms the Nervous System
Slow breathing and supported poses help activate the parasympathetic nervous system, often called “rest and digest” mode. This is the state your body needs to heal. When you’re stuck in stress mode, recovery slows down. The National Center for Complementary and Integrative Health notes that yoga may help with stress management and improve sleep quality, both of which matter for recovery.
Improves Flexibility and Range of Motion
Tight hips, hamstrings, and shoulders are common after intense training or long days of sitting. Regular gentle yoga stretches gradually improve how freely your joints move, which can lower your chances of strain during future workouts.
Supports Better Sleep
Sleep is when most physical repair happens. A short evening routine with calming poses can help you wind down and fall asleep more easily. Harvard Health has written about how yoga’s benefits reach well beyond the mat, including better sleep and less stress.
Helps You Tune In to Your Body
Recovery yoga teaches you to notice where you’re holding tension. Over time, that awareness helps you catch small problems before they turn into injuries.
Who Can Benefit from Recovery Yoga?
Almost anyone can benefit from recovery yoga poses, but some groups tend to notice the difference quickly:
- Athletes and gym-goers who want to reduce soreness and bounce back faster between sessions.
- Runners and cyclists who deal with tight hips, hamstrings, and calves.
- Office workers who sit for long hours and feel stiff in the back, neck, and hips.
- People in injury recovery who have been cleared by a doctor or physical therapist to move gently.
- Anyone under high stress who needs a way to slow down and rest properly.
- Older adults looking for low-impact movement that keeps joints mobile.
If you’re recovering from surgery, a serious injury, or a medical condition, talk to your healthcare provider before starting. Many poses can be modified, but it’s worth getting advice that fits your situation.
10 Yoga for Recovery Poses That Help Your Body Heal
Here are ten of the best recovery yoga poses. Move slowly, breathe through your nose if you can, and never force a stretch. Mild sensation is fine. Sharp pain is a signal to back off.
1. Child’s Pose (Balasana)
Child’s Pose is the classic resting pose for a reason. It gently stretches the lower back, hips, and thighs while encouraging slow, calm breathing.
How to do it:
- Kneel on your mat with your big toes touching and knees apart.
- Sit your hips back toward your heels.
- Walk your hands forward and lower your chest toward the floor.
- Rest your forehead on the mat, a block, or a folded blanket.
- Stay for 1 to 3 minutes, breathing into your back.
Why it helps: It releases tension in the lower back and gives your nervous system a clear signal to relax.
Tip: If your hips don’t reach your heels, place a pillow between your calves and thighs.
2. Legs Up the Wall (Viparita Karani)
This is one of the most loved poses in any restorative yoga routine, especially after running or long hours on your feet.
How to do it:
- Sit sideways next to a wall.
- Lie back as you swing your legs up the wall.
- Scoot your hips as close to the wall as feels comfortable.
- Rest your arms by your sides, palms up.
- Stay for 5 to 10 minutes.
Why it helps: It encourages circulation from the legs back toward the heart, can reduce the heavy feeling in tired legs, and is deeply calming.
Tip: Place a folded blanket under your hips for extra support.
3. Cat-Cow (Marjaryasana-Bitilasana)
Cat-Cow is gentle movement rather than a held pose, which makes it perfect for warming up a stiff spine.
How to do it:
- Start on your hands and knees, wrists under shoulders and knees under hips.
- As you inhale, drop your belly, lift your chest, and look slightly up (Cow).
- As you exhale, round your spine, tuck your chin, and press the floor away (Cat).
- Repeat slowly for 8 to 10 rounds.
Why it helps: It mobilizes each part of the spine and gets blood flowing without any strain.
Tip: Put a blanket under your knees if they feel sensitive.
4. Supine Spinal Twist (Supta Matsyendrasana)
Twists feel great after workouts that load the spine, like squats, deadlifts, or long runs.
How to do it:
- Lie on your back and hug your right knee into your chest.
- Guide the right knee across your body to the left.
- Extend your right arm out to the side and look right if your neck allows.
- Hold for 1 to 2 minutes, then switch sides.
Why it helps: It releases the lower back, glutes, and outer hips while gently opening the chest.
Tip: Rest your bent knee on a pillow if it doesn’t reach the floor.
5. Reclined Bound Angle Pose (Supta Baddha Konasana)
This supported hip opener is ideal for stress relief and rest.
How to do it:
- Lie on your back and bring the soles of your feet together.
- Let your knees fall open to the sides.
- Place blocks or pillows under each knee for support.
- Rest one hand on your belly and one on your chest.
- Stay for 3 to 5 minutes, breathing slowly.
Why it helps: It gently opens the inner thighs and groin while letting the whole body relax.
Tip: Lying back on a bolster placed along your spine adds a soft chest opening.
6. Supported Bridge Pose (Setu Bandha Sarvangasana)
A supported version of bridge offers a mild backbend without effort.
How to do it:
- Lie on your back with knees bent and feet flat, hip-width apart.
- Press into your feet and lift your hips.
- Slide a yoga block or firm cushion under your sacrum (the flat bone at the base of your spine).
- Let your body rest on the support.
- Stay for 2 to 5 minutes, then remove the block and lower slowly.
Why it helps: It opens the hip flexors and chest, which often get tight from sitting and training.
Tip: Start with the block on its lowest height and raise it only if it feels good.
7. Seated Forward Fold (Paschimottanasana)
This pose targets the hamstrings and calves, which are often tight after running, cycling, or leg day.
How to do it:
- Sit with your legs straight out in front of you.
- Bend your knees slightly if your hamstrings are tight.
- Inhale to lengthen your spine.
- Exhale and fold forward from your hips, letting your hands rest wherever they land.
- Hold for 1 to 3 minutes.
Why it helps: It stretches the entire back of the body and has a naturally calming effect.
Tip: Sit on a folded blanket to tilt your pelvis forward and make the fold easier.
8. Thread the Needle (Parsva Balasana)
If your shoulders and upper back feel knotted, this one is a favorite.
How to do it:
- Start on your hands and knees.
- Slide your right arm under your left arm, palm facing up.
- Lower your right shoulder and the side of your head to the mat.
- Keep your hips over your knees.
- Hold for 1 minute, then switch sides.
Why it helps: It releases tension between the shoulder blades and gently twists the upper spine.
Tip: Place a folded blanket under your head for comfort.
9. Low Lunge (Anjaneyasana)
Hip flexors take a beating from both sitting and running. Low Lunge gives them some much-needed length.
How to do it:
- From hands and knees, step your right foot forward between your hands.
- Lower your left knee to the mat and slide it back a little.
- Rest your hands on your front thigh or on blocks.
- Gently shift your hips forward until you feel a stretch in the front of the left hip.
- Hold for 1 minute, then switch sides.
Why it helps: It stretches the hip flexors and quads, which can ease lower back tension too.
Tip: Pad your back knee with a blanket, and keep the stretch mild rather than deep.
10. Corpse Pose (Savasana)
It looks like nothing, but Savasana is where your body absorbs the benefits of your practice.
How to do it:
- Lie flat on your back with legs slightly apart.
- Let your arms rest by your sides, palms facing up.
- Close your eyes and let your breath find its natural rhythm.
- Scan your body from head to toe and release any tension you notice.
- Stay for 5 to 10 minutes.
Why it helps: It gives your nervous system time to settle fully, which supports deeper rest and repair.
Tip: Place a pillow under your knees to take pressure off your lower back.
How to Build a Simple Yoga for Recovery Routine
You don’t need to do all ten poses every time. Here’s a 20-minute sequence that covers the whole body and flows naturally from one pose to the next.
Sample 20-Minute Recovery Sequence
- Cat-Cow: 1 minute to warm up the spine
- Thread the Needle: 1 minute per side
- Low Lunge: 1 minute per side
- Child’s Pose: 2 minutes
- Seated Forward Fold: 2 minutes
- Supported Bridge: 2 minutes
- Supine Spinal Twist: 1 minute per side
- Legs Up the Wall: 4 minutes
- Savasana: 3 to 5 minutes
When to Practice
- After a workout: A short post-workout yoga session helps your body shift into recovery mode. Five to ten minutes is enough.
- On rest days: A longer session works well as active recovery.
- Before bed: Focus on Legs Up the Wall, Reclined Bound Angle, and Savasana for better sleep.
- During stressful weeks: Even three poses in the evening can help you reset.
How Often Should You Do It?
Two to four sessions per week is a good starting point. If you train hard most days, a few minutes after each session plus one longer practice on your rest day works well. Consistency matters more than length.
Breathing Techniques That Boost Recovery
Your breath is the engine of any yoga for recovery practice. Pair these techniques with the poses above:
- Belly breathing: Place a hand on your belly and breathe so it rises on the inhale and falls on the exhale. This encourages relaxation.
- Longer exhales: Inhale for a count of four, exhale for a count of six. A longer exhale tends to slow the heart rate and calm the mind.
- Box breathing: Inhale for four, hold for four, exhale for four, hold for four. It’s great for settling racing thoughts.
Try to keep your breathing smooth and quiet. If you notice you’re holding your breath, that’s usually a sign to ease out of the stretch a little.
Safety Tips for Recovery Yoga
Yoga for sore muscles should feel soothing, not punishing. Keep these points in mind:
- Go slow. Recovery isn’t the time to chase deeper stretches.
- Use props freely. Blankets, pillows, blocks, and towels make poses more comfortable and more effective.
- Respect pain. Mild stretching sensation is normal. Sharp, pinching, or shooting pain means stop.
- Stay warm. Muscles relax more easily when your body is warm, so a blanket over you in Savasana helps.
- Skip poses that don’t suit you. If you have high blood pressure, glaucoma, or are pregnant, some poses (like inversions) may need changes. Check with your doctor.
- Get medical advice for injuries. For injury recovery, work with a physical therapist or doctor who can tell you which movements are safe for your specific condition.
Common Mistakes to Avoid
Even gentle yoga can go wrong if you rush it. Watch out for these:
- Treating it like a workout. The goal is rest, so resist the urge to push.
- Holding poses too briefly. Recovery poses work best with longer holds, usually one minute or more.
- Skipping Savasana. It’s tempting to leave early, but this is where much of the calming effect happens.
- Forgetting to breathe. Tight, shallow breathing keeps your body in stress mode.
- Only doing it when something hurts. Regular practice prevents problems better than occasional practice fixes them.
Frequently Asked Questions
Is yoga good for muscle recovery?
Yes. Yoga for muscle recovery helps by improving circulation, easing tightness, and encouraging relaxation. It’s not a replacement for sleep, hydration, and good nutrition, but it works well alongside them.
Can I do recovery yoga every day?
Most people can. Because the poses are gentle and low-impact, daily practice is generally safe. Just listen to your body and adjust based on how you feel.
How long should I hold each recovery pose?
Aim for 1 to 5 minutes for most poses. Supported poses like Legs Up the Wall and Savasana can be held longer, up to 10 minutes or more.
Do I need props for restorative yoga?
Props help, but you don’t need to buy anything special. Pillows, rolled towels, and a sturdy book work fine as substitutes for bolsters and blocks.
Is yoga safe after an injury?
It can be, but only with guidance. Some poses may put stress on the injured area. Get clearance from a healthcare provider first and ask which movements to avoid.
Conclusion
Yoga for recovery gives your body what it often doesn’t get enough of: time and space to repair. The ten poses in this guide, from Child’s Pose and Cat-Cow to Legs Up the Wall and Savasana, work together to ease sore muscles, open tight hips and shoulders, calm your nervous system, and help you sleep better, all without adding strain.
You don’t need a long session or perfect flexibility to feel the benefits; a steady 15 to 20 minutes a few times a week, slow breathing, and plenty of props will take you a long way. Practice gently, respect what your body tells you, check with a professional if you’re managing an injury, and treat recovery as a real part of your routine rather than an afterthought.yoga for recovery